![]()
[2024年06月]更新のLinux Foundation CKA実際のブレーン知能問題集
合格できるCKA試験更新されたCKA試験問題集PDFを獲得2024年更新
質問 # 10
Create an nginx pod and list the pod with different levels of verbosity
正解:
解説:
// create a pod
kubectl run nginx --image=nginx --restart=Never --port=80
// List the pod with different verbosity
kubectl get po nginx --v=7
kubectl get po nginx --v=8
kubectl get po nginx --v=9
質問 # 11
What file type upload is supported as part of the basic WildFire service?
- A. ELF
- B. PE
- C. VBS
- D. BAT
正解:B
質問 # 12
Create and configure the service front-end-service so it's accessible through NodePort and routes to the existing pod named front-end.
正解:
解説:
See the solution below.
Explanation
solution
F:\Work\Data Entry Work\Data Entry\20200827\CKA\8 B.JPG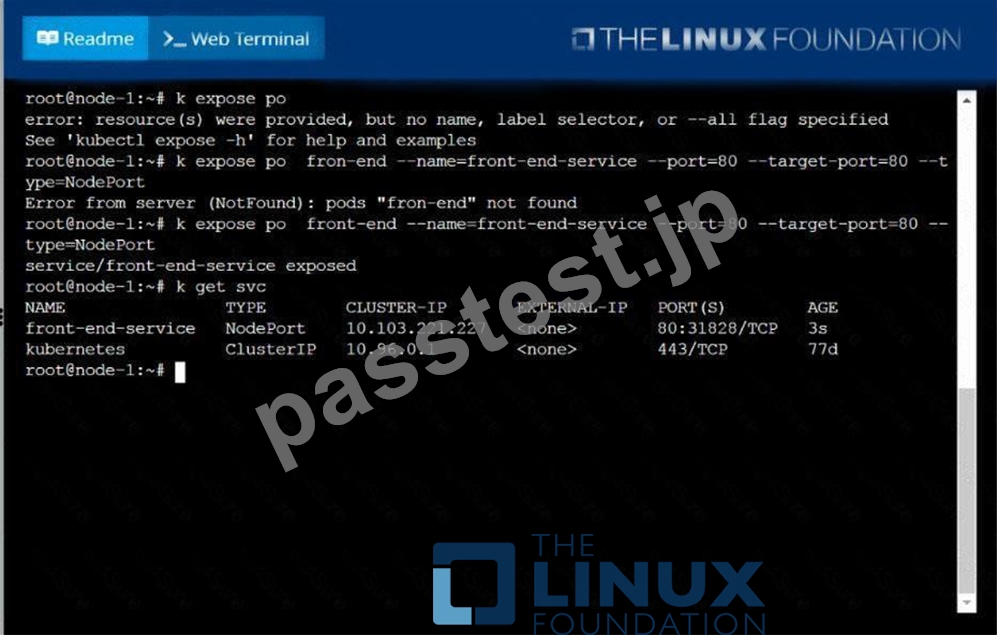
質問 # 13
Create a pod with init container which create a file "test.txt"
in "workdir" directory. Main container should check a file
"test.txt" exists and execute sleep 9999 if the file exists.
- A. // create an initial yaml file with this
kubectl run init-cont-pod --image=alpine --restart=Never --dry-run -o
yaml > init-cont-pod.yaml
// edit the yml as below and create it
vim init-cont-pod.yaml
apiVersion: v1
kind: Pod
metadata:
name: init-cont-pod
labels:
app: myapp
spec:
volumes:
- name: test-volume
emptyDir: {}
containers:
- name: main-container
image: busybox:1.28
command: ['sh', '-c', 'if [ -f /workdir/test.txt ]; then sleep
9999; fi']
volumeMounts:
image: busybox:1.28
command: ['sh', '-c', "mkdir /workdir; echo >
/workdir/test.txt"]
volumeMounts:
- name: test-volume
mountPath: /workdir
// Create the pod
kubectl apply -f init-cont-pod.yaml
kubectl get pods
// Check Events by doing
kubectl describe po init-cont-pod
Init Containers:
init-myservice:
Container ID:
docker://ebdbf5fad1c95111d9b0e0e2e743c2e347c81b8d4eb5abcccdfe1dd74524
0d4f
Image: busybox:1.28
Image ID: dockerpullable://busybox@sha256:141c253bc4c3fd0a201d32dc1f493bcf3fff003b6df
416dea4f41046e0f37d47
Port: <none>
Host Port: <none>
Command:
sh
-c
mkdir /workdir; echo > /workdir/test.txt
State: Terminated Reason: Completed - B. // create an initial yaml file with this
kubectl run init-cont-pod --image=alpine --restart=Never --dry-run -o
yaml > init-cont-pod.yaml
// edit the yml as below and create it
vim init-cont-pod.yaml
apiVersion: v1
kind: Pod
metadata:
name: init-cont-pod
labels:
app: myapp
spec:
volumes:
- name: test-volume
emptyDir: {}
containers:
- name: main-container
image: busybox:1.28
command: ['sh', '-c', 'if [ -f /workdir/test.txt ]; then sleep
9999; fi']
volumeMounts:
- name: test-volume
mountPath: /workdir
initContainers:
- name: init-myservice
image: busybox:1.28
command: ['sh', '-c', "mkdir /workdir; echo >
/workdir/test.txt"]
volumeMounts:
- name: test-volume
mountPath: /workdir
// Create the pod
kubectl apply -f init-cont-pod.yaml
kubectl get pods
// Check Events by doing
kubectl describe po init-cont-pod
Init Containers:
init-myservice:
Container ID:
docker://ebdbf5fad1c95111d9b0e0e2e743c2e347c81b8d4eb5abcccdfe1dd74524
0d4f
Image: busybox:1.28
Image ID: dockerpullable://busybox@sha256:141c253bc4c3fd0a201d32dc1f493bcf3fff003b6df
416dea4f41046e0f37d47
Port: <none>
Host Port: <none>
Command:
sh
-c
mkdir /workdir; echo > /workdir/test.txt
State: Terminated Reason: Completed
正解:B
質問 # 14
Check the Image version of nginx-dev pod using jsonpath
正解:
解説:
See the solution below.
Explanation
kubect1 get po nginx-dev -o
jsonpath='{.spec.containers[].image}{"\n"}'
質問 # 15
Watch the job that runs 10 times one by one and verify 10 pods are created and delete those after it's completed
正解:
解説:
kubectl get job -w kubectl get po kubectl delete job hello-job
質問 # 16
Create 2 nginx image pods in which one of them is labelled with env=prod and another one labelled with env=dev and verify the same.
正解:
解説:
See the solution below.
Explanation
kubectl run --generator=run-pod/v1 --image=nginx -- labels=env=prod nginx-prod --dry-run -o yaml > nginx-prodpod.yaml Now, edit nginx-prod-pod.yaml file and remove entries like "creationTimestamp: null"
"dnsPolicy: ClusterFirst"
vim nginx-prod-pod.yaml
apiVersion: v1
kind: Pod
metadata:
labels:
env: prod
name: nginx-prod
spec:
containers:
- image: nginx
name: nginx-prod
restartPolicy: Always
# kubectl create -f nginx-prod-pod.yaml
kubectl run --generator=run-pod/v1 --image=nginx --
labels=env=dev nginx-dev --dry-run -o yaml > nginx-dev-pod.yaml
apiVersion: v1
kind: Pod
metadata:
labels:
env: dev
name: nginx-dev
spec:
containers:
- image: nginx
name: nginx-dev
restartPolicy: Always
# kubectl create -f nginx-prod-dev.yaml
Verify :
kubectl get po --show-labels
kubectl get po -l env=prod
kubectl get po -l env=dev
質問 # 17
Get list of all the pods showing name and namespace with a jsonpath expression.
正解:
解説:
See the solution below.
Explanation
kubectl get pods -o=jsonpath="{.items[*]['metadata.name'
, 'metadata.namespace']}"
質問 # 18
List all configmap and secrets in the cluster in all namespace and write it to a file /opt/configmap-secret
正解:
解説:
kubectl get configmap,secrets --all-namespaces > /opt/configmap-secret // Verify Cat /opt/configmap-secret
質問 # 19
Scale the deployment to 5 replicas
正解:
解説:
kubectl scale deployment webapp -replicas=5 //Verify kubectl get deploy kubectl get po,rs
質問 # 20
Create a nginx pod with label env=test in engineering namespace
正解:
解説:
See the solution below.
Explanation
kubectl run nginx --image=nginx --restart=Never --labels=env=test --namespace=engineering --dry-run -o yaml > nginx-pod.yaml kubectl run nginx --image=nginx --restart=Never --labels=env=test --namespace=engineering --dry-run -o yaml | kubectl create -nengineering-f - YAML File:
apiVersion: v1
kind: Pod
metadata:
name: nginx
namespace: engineering
labels:
env: test
spec:
containers:
- name: nginx
image: nginx
imagePullPolicy: IfNotPresent
restartPolicy: Never
kubectl create -f nginx-pod.yaml
質問 # 21
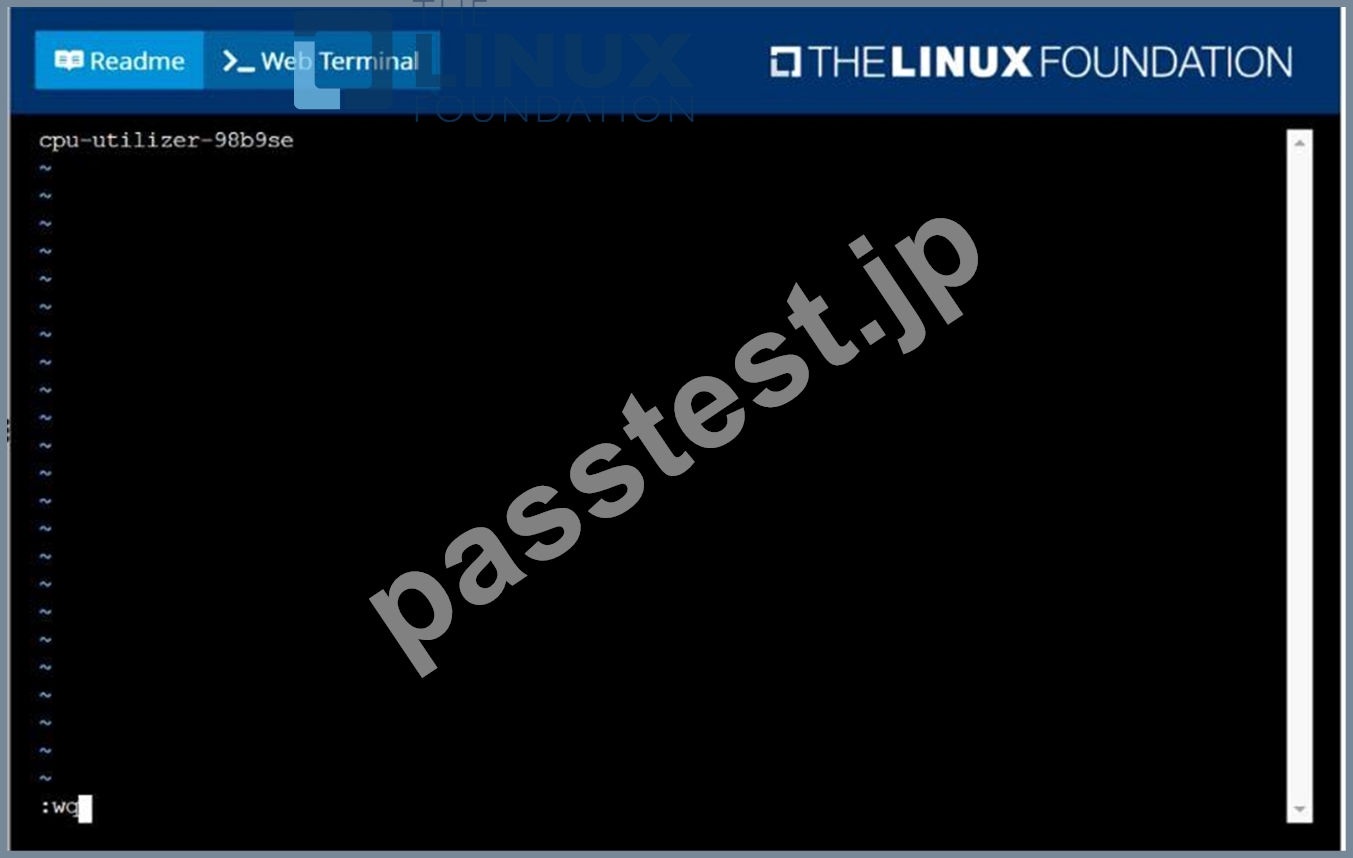
From the pod label name=cpu-utilizer, find pods running high CPU workloads and write the name of the pod consuming most CPU to the file /opt/KUTR00102/KUTR00102.txt (which already exists).
正解:
解説:
solution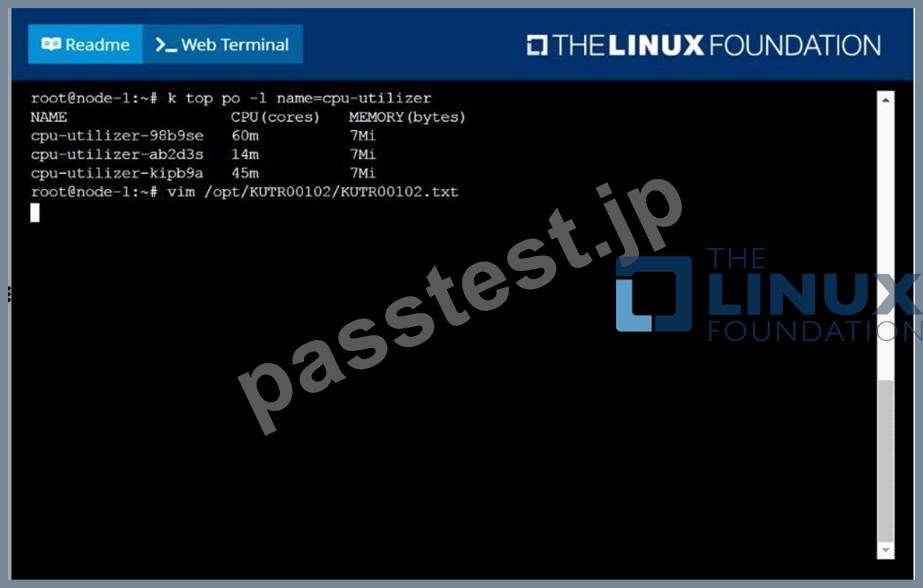
質問 # 22
Create a Pod nginx and specify both CPU, memory requests and limits together and verify.
- A. kubectl run nginx-request --image=nginx --restart=Always --dryrun -o yaml > nginx-request.yml
// add the resources section and create
apiVersion: v1
kind: Pod
metadata:
labels:
run: nginx
name: nginx-request
spec:
containers:
- image: nginx
name: nginx
resources:
requests:
memory: "100Mi"
cpu: "0.5"
limits:
memory: "200Mi"
cpu: "1"
restartPolicy: Always
k kubectl apply -f nginx-request.yaml
// Verify
Kubectl top po - B. kubectl run nginx-request --image=nginx --restart=Always --dryrun -o yaml > nginx-request.yml
// add the resources section and create
apiVersion: v1
kind: Pod
metadata:
labels:
run: nginx
name: nginx
resources:
requests:
memory: "100Mi"
cpu: "0.4"
limits:
memory: "200Mi"
cpu: "7"
restartPolicy: Always
k kubectl apply -f nginx-request.yaml
// Verify
Kubectl top po
正解:A
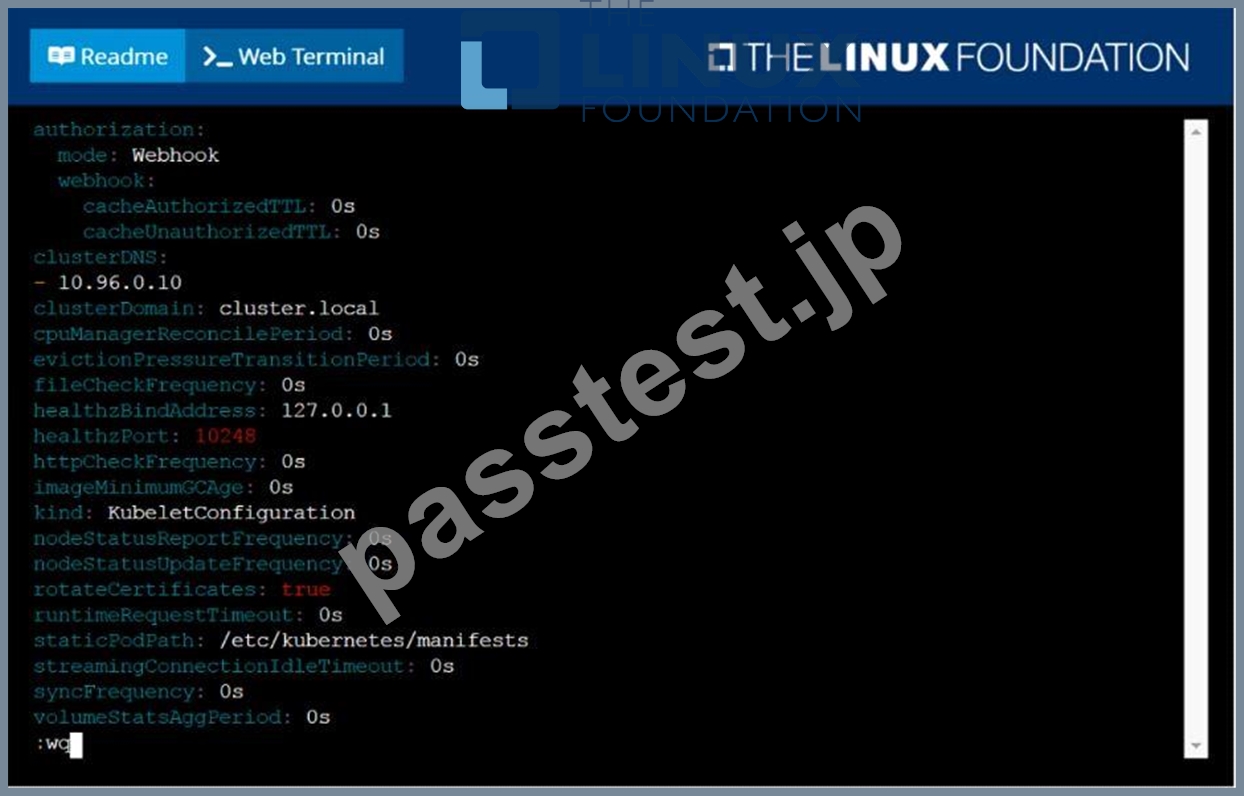
質問 # 23
Given a partially-functioning Kubernetes cluster, identify symptoms of failure on the cluster.
Determine the node, the failing service, and take actions to bring up the failed service and restore the health of the cluster. Ensure that any changes are made permanently.
You can ssh to the relevant I nodes (bk8s-master-0 or bk8s-node-0) using:
[student@node-1] $ ssh <nodename>
You can assume elevated privileges on any node in the cluster with the following command:
[student@nodename] $ | sudo -i
正解:
解説:
solution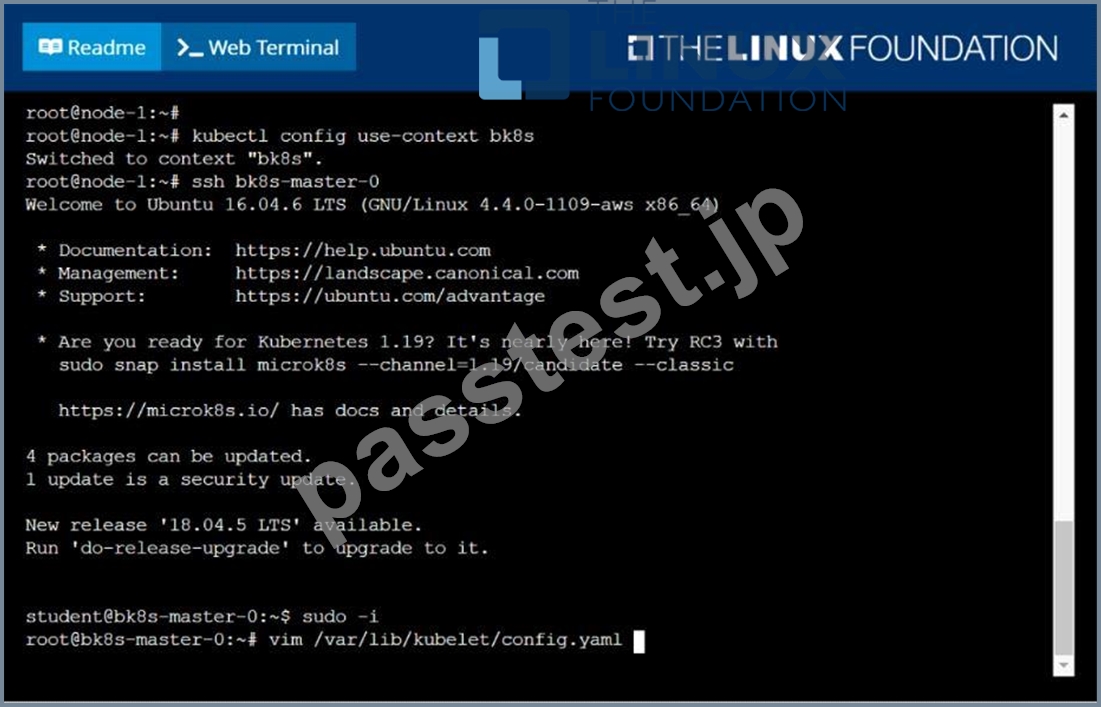

質問 # 24
Create and configure the servicefront-end-serviceso it's accessiblethroughNodePortand routes to theexisting pod namedfront-end.
正解:
解説:
See the solution below.
Explanation
solution
質問 # 25
Create a configmap called cfgvolume with values var1=val1,
var2=val2 and create an nginx pod with volume nginx-volume which
reads data from this configmap cfgvolume and put it on the path
/etc/cfg
- A. // first create a configmap cfgvolume
kubectl create cm cfgvolume --from-literal=var1=val1 --fromliteral=var2=val2
// verify the configmap
kubectl describe cm cfgvolume
// create the config map
kubectl create -f nginx-volume.yml
vim nginx-configmap-pod.yaml
apiVersion: v1
kind: Pod
metadata:
labels:
run: nginx
name: nginx
spec:
volumes:
- name: nginx-volume
configMap:
name: cfgvolume
containers:
- image: nginx
name: nginx
volumeMounts:
- name: nginx-volume
mountPath: /etc/cfg
restartPolicy: Always
k kubectl apply -f nginx-configmap-pod.yaml
/ // Verify
// exec into the pod
kubectl exec -it nginx -- /bin/sh
// check the path
cd /etc/cfg - B. // first create a configmap cfgvolume
kubectl create cm cfgvolume --from-literal=var1=val1 --fromliteral=var2=val2
// verify the configmap
kubectl describe cm cfgvolume
// create the config map
kubectl create -f nginx-volume.yml
vim nginx-configmap-pod.yaml
apiVersion: v1
kind: Pod
- name: nginx-volume
configMap:
name: cfgvolume
containers:
- image: nginx
name: nginx
volumeMounts:
- name: nginx-volume
mountPath: /etc/cfg
restartPolicy: Always
k kubectl apply -f nginx-configmap-pod.yaml
/ // Verify
// exec into the pod
kubectl exec -it nginx -- /bin/sh
// check the path
cd /etc/cfg
正解:A
質問 # 26
Print pod name and start time to "/opt/pod-status" file
正解:
解説:
kubect1 get pods -o=jsonpath='{range .items[*]}{.metadata.name}{"\t"}{.status.podIP}{"\n"}{end}'
質問 # 27
Score: 4%
Context
You have been asked to create a new ClusterRole for a deployment pipeline and bind it to a specific ServiceAccount scoped to a specific namespace.
Task
Create a new ClusterRole named deployment-clusterrole, which only allows to create the following resource types:
* Deployment
* StatefulSet
* DaemonSet
Create a new ServiceAccount named cicd-token in the existing namespace app-team1.
Bind the new ClusterRole deployment-clusterrole lo the new ServiceAccount cicd-token , limited to the namespace app-team1.
正解:
解説:
Solution:
Task should be complete on node k8s -1 master, 2 worker for this connect use command
[student@node-1] > ssh k8s
kubectl create clusterrole deployment-clusterrole --verb=create --resource=deployments,statefulsets,daemonsets kubectl create serviceaccount cicd-token --namespace=app-team1 kubectl create rolebinding deployment-clusterrole --clusterrole=deployment-clusterrole --serviceaccount=default:cicd-token --namespace=app-team1
質問 # 28
Score: 4%
Task
Scale the deployment presentation
正解:
解説:
See the solution below.
Explanation
Solution:
kubectl get deployment
kubectl scale deployment.apps/presentation --replicas=6
質問 # 29
Check nodes which are ready and print it to a file /opt/nodestatus
- A. JSONPATH='{range .items[*]}{@.metadata.name}:{range
@.status.conditions[*]}{@.type}={@.status};{end}{end}' \
//Verify
cat /opt/node-status - B. JSONPATH='{range .items[*]}{@.metadata.name}:{range
@.status.conditions[*]}{@.type}={@.status};{end}{end}' \
&& kubectl get nodes -o jsonpath="$JSONPATH" | grep
"Ready=True" > /opt/node-status
//Verify
cat /opt/node-status
正解:B
質問 # 30
An Administrator is configuring Authentication Enforcement and they would like to create an exemption rule to exempt a specific group from authentication. Which authentication enforcement object should they select?
- A. default-authentication-bypass
- B. default-browser-challenge
- C. default-web-form
- D. default-no-captive-port
正解:D
質問 # 31
Score: 4%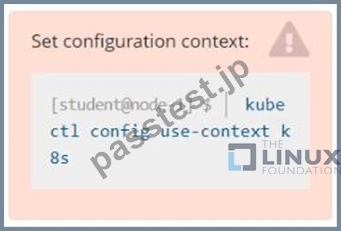
Task
Check to see how many nodes are ready (not including nodes tainted NoSchedule ) and write the number to
/opt/KUSC00402/kusc00402.txt
正解:
解説:
See the solution below.
Explanation
Solution:
kubectl describe nodes | grep ready|wc -l
kubectl describe nodes | grep -i taint | grep -i noschedule |wc -l
echo 3 > /opt/KUSC00402/kusc00402.txt
#
kubectl get node | grep -i ready |wc -l
# taintsnoSchedule
kubectl describe nodes | grep -i taints | grep -i noschedule |wc -l
#
echo 2 > /opt/KUSC00402/kusc00402.txt
質問 # 32
Get list of persistent volumes and persistent volume claim in the cluster
正解:
解説:
kubectl get pv kubectl get pvc
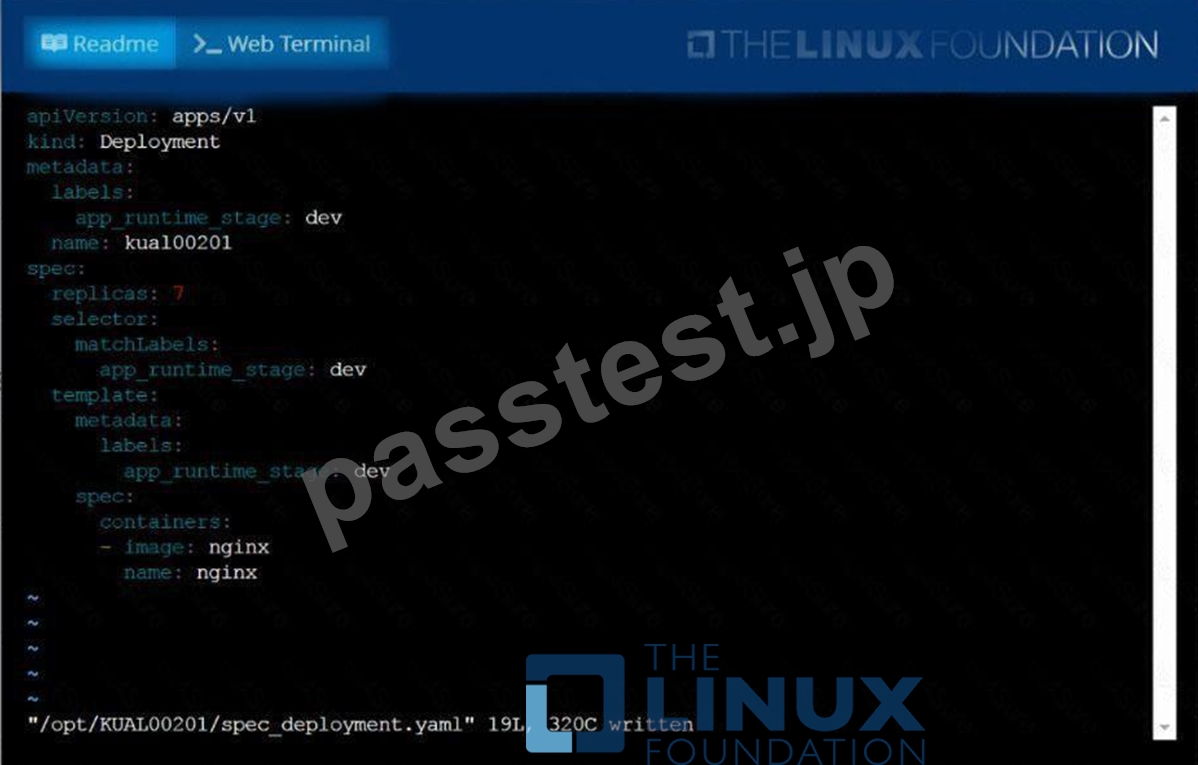
質問 # 33
Create a deployment spec file that will:
* Launch 7 replicas of the nginx Image with the labelapp_runtime_stage=dev
* deployment name: kual00201
Save a copy of this spec file to /opt/KUAL00201/spec_deployment.yaml
(or /opt/KUAL00201/spec_deployment.json).
When you are done, clean up (delete) any new Kubernetes API object that you produced during this task.
正解:
解説:
See the solution below.
Explanation
solution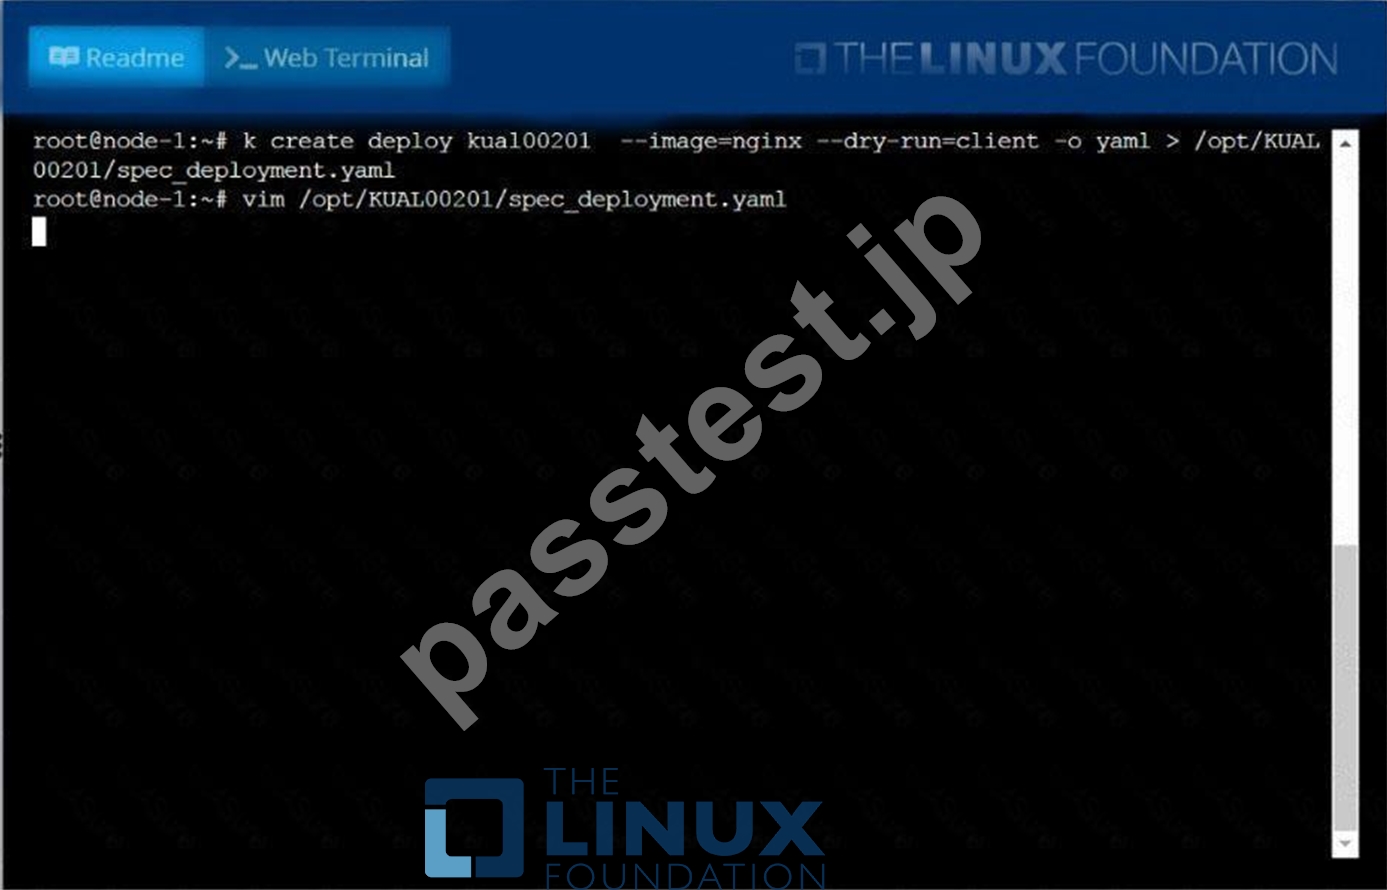
質問 # 34
......
更新されたCKAパスして合格保証試験問題集正確で更新された問題:https://www.passtest.jp/Linux-Foundation/CKA-shiken.html
CKA試験知能問題集で学習ノートと理論:https://drive.google.com/open?id=1f4yKZvoXEz9RJveJ0NAfu75ONpAId3xx